Saturday, January 29, 2022

M&M On The Move

Good morning from VERY chilly Central Florida! Good grief - it's cold outside! Last week M&M were in Maryland at a quilt retreat. Marjorie doesn't have a lot of experience with really cold weather and Mary has become less accustomed to being cold. We were COLD! It did snow and it was pretty.


Spending time (5 days!) with women friends - sewing and laughing and eating was heart-warming (see what I did there?) and we sure did need to be warm! 11 quilters from FL, AZ and MD - such fun. We're already planning our great escape for next year. Do you have close gal-pals? You need them!


Right before we left town, I finished Twinkle Twos. Remember that challenge? My top had been done for ages and now it is completely D.O.N.E.


Never made it? Don't remember this one ... check out the files in our M&M Sew Charming Facebook group - it's there and free!


As we get into 2022, we are still sewing and still challenging you, dear reader, to get sewing. We are makers! My 500 Member Challenge is a top without borders - they're coming. My Baby It's Hot Outside quilt is coming along. I've completed 4 out of 11 rows and the others are cut/prepped. AND ... M&M are both working on "super secret" stuff for YOU!

Stay warm whereever you are!


Thursday, January 13, 2022

Temperature Quilt

Are you planning a Temperature Quilt? The Canuk Quilter has a great free pattern and lots of hints for keeping track of which fabric/color represents a range of weather temperatures. You do have to sign up for her newsletter to get the pattern. She has lots of inspiring stuff!

Then ... go to the M&M Facebook page and look under files for "Baby It's HOT Outside". There you will find my math changes to make this quilt with charms, 2.5" squares and/or 2.5" strips.


The Quilting Sheep 

Here's another example of a similiar quilt but it's made with Color Rows.


The possibilites are endless for color design ... Keep the background 1 color/fabric or make it scrappy. The rows can represent the weather temperature. Pick a year and Goggle it for what the temps were and make a quilt for a special someone's special year - birth, wedding, major life event. Each "block strip" is made from 2 squares (2.5") - how about the high and the low temp for that day?

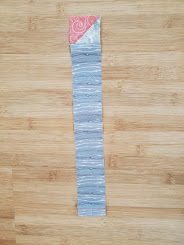
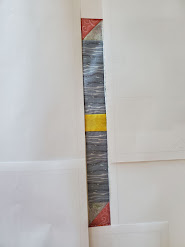
Living in Florida, we don't have a wide range of temperatures AND it's often hot outside (see what I did there?) AND I don't want to wait a whole year to complete my quilt. I decided to go with a scrappy rainbow theme. Each row will be a made from light and dark squares of a given color with a neutral background. According to the M&M pattern, I will make 5 of these blocks and add 1 extra block strip at the end of the row for a more finished look.


This is another USE IT UP kind of quilt ... our fav! Start sewing some block strips and rows and post your pictures in the M&M Facebook group. We love seeing what everyone is making.


Tuesday, December 14, 2021

Second Hand Stars

As quilters and makers ... we quilt and make. It's almost never about "needing a quilt." Its almost always about "needing to MAKE a quilt."  Did you make The Perfect Storm quilt?


The Perfect Storm quilt produced a LOT of cut-offs. They are my very favorite unit to play with in a quilt. 

Sew - what can you do with your parts?

Once the Storm is DONE. The sky clears and out come the Stars. Don't let this opportunity get away. In fact, use what you started ... you're already on your way.


Check out the M&M Sew Charming Facebook Group in the file, there is a pattern for both "The Perfect Storm and Second Hand Stars. This post has more pictures, words and helpful hints than is in the written instructions ... think of it as a companion piece to the companion piece.

Remember ... it says in the instructions ... the MATH for this quilt isn't hard but it is NOT typical. Make sure you read it carefully.

Gather up all those cut-offs. Hopefully, they are already stitched together in pairs into half-square triangles (hst's). If not ... start stitching them! Then square them up. I was able to square all of mine to 1.75" x 1.75". If you can do that ... do that. If not, you should be able to square up to 1.5" x 1.5". The pattern has instructions for the MATH, either way.


The orange/neutral HST's were all squared-up and then set aside ... their job comes later. The yellow/neutral ... also square-up and set aside - they aren't used in the quilt but I'm quite sure they will find their place in the quilt world someday. You will need the other HST's.

When stitching 2 HST's together (to make a faux Flying Geese), pressing matters! "Flip" one of the HST's" to the light and keep one to the dark before stitching. You can press these 1st or just finger flip and pin.


The seam will snuggle so nicely if they are going in opposite directions. The points will match sew much easier this way.


After you build your star blocks (read the pattern - it's pretty simple), you will be using them as the center for a light/dark log cabin. I choose to use neutrals for the top/left and blues/greens for the right/bottom. This was in keeping with my Perfect Storm ... hello, floor fabric!  I used 1.5" strips - stitching a light /dark (left/right) then a light/dark (top/bottom). I did these assembly-line and did not square up ... just kept on sewing. Do this for 2 full rounds on each block.


THEN switch to 2.5" strips. This is a game changer for getting the blocks all to the same size.After stitching the 3rd round (2.5" strips this time), square-up the blocks to measure 12.5". Now they are nice and uniform ... SEW much easier to work with then trying to precision sew from scraps, strips and leftovers.


SASHING TIME!!
When I first started my Second Hand Stars, I pulled all the orange/neutral HST's. These I saved for the sashing. I laid this whole quilt out, adjusting the log cabins in a pleasing pattern, making sure the color was evenly distributed ... you know ... move the blocks and move the blocks and move the blocks again, then put the blocks back and take a picture and walk away. Come back and move the blocks around a little more and sigh. FINALLY - be happy with the layout.

Remember ... check the pattern for weird MATH when cutting and sewing your strips. The MATH is correct (I think) it's just not typical quilter MATH.


Then, layout the sashing strips and the HST's. You will be making Second Hand Friendship Stars in the middle of the quilt but not at the edges. It really is easier if you lay it out then stitch it together. I only had to rip out 1 seam and resew it correctly. THAT is a great feeling.!!

Borders? Yes, please!

The decision about the borders took forever. I thought about doing a pieced border - flying geese? More HST's? Then I thought - just use a big chunk of fabric and GET-IT-DONE.

But ... in keeping with the Second Hand Stars theme - I decided to do an easy pieced border from my 2 1/2" scrap bin. I pulled lots of strips (blues/greens) and stitched them together. I measured, cut and sewed them on, building the strip snake as needed.  2 rounds gave me a 4 1/2" border that seemed just right.

Go the the M&M Sew Charming Facebook group for the complete pattern.


Monday, September 20, 2021

The Perfect Storm

 Are you stitching along with us?

M&M's newest quilt challenge is uploaded on our Facebook page. Haven't seen it? Go look right now! Then come back for some help and inspiration.  Because we live in Florida and it's hurricane season, we decided to call our Quilt-along ... The Perfect Storm.

My inspiration picture for my color palette came from a screen shot. The fabrics were sitting in my sewing room and really wanted to be made into a quilt.


THAT did not happen. After pulling more fabrics and playing with floor fabric and adding to the piles and accepting and rejecting ... FINALLY ... I jumped in - the oranges were left for another day, another quilt, another time.


This is not a mystery. We've posted pictures of our starts and possiblities and even some blocks. The quilt wasn't finished when we started ... we were sewing along with our pals.  Today we posted Part 3 - it's all easy sewing, basic blocks and lots of cut-offs.

When I say LOTS ... I mean a lot of LOTS. Keep them! We have a project for later that will use these - we're calling it "Second Hand." Stitch them together into HSTs (1/2-square triangles) and put them aside - you can thank us later.


Part 3


Part 2


Part 1


My quilt is D.O.N.E. Someone had to be first and fast and check the math and the instructions, which need some adjusting. My math is pretty good but sometimes I can't count.

This Quilt-along is meant to take awhile ... hurricane season goes until November. It's a slow-sew ... no worries, no timeline, no hassels. What kind of storm do you picture in fabric ... Sand storm, rain storm, ice storm, blizzard, tsunami? 


Don't forget to post pictures in the Facebook group. We all love to see what's happening in your sewing room!

Keep stitching,
Mary


Saturday, August 14, 2021

Hello August!

 In typical Florida fashion, today (all weekend, in fact) it's thundery and rainy. It gets dark and noisy and then the sun comes out and then repeats. A really good day for indoor activities - like quilting! Thank you, Tropical Storm FRED!

1/2 of the M&M squad is enjoying a beach vacation with her family. This past week, we did have some beautiful sunny days. The other 1/2 (Mary) is enjoying a VERY productive "get-it-DONE" week.  Next week, after FRED, I hope to have a meet up and a much needed beach day.

Sew ... 

Get-it-DONE!

I present - Boston Uncommon!

 This is a gigantic/jumbo quilt - it measures 100" x 110". It was way too big for me to quilt. My friend and M&M follower, Donna Capps, came to my recue and did a beautiful job quilting. It now has a binding and a label. I used the 96-Charm Challenge technique with 6.5" squares - I wanted to make sure it was big.  OK ... 6.5" was BIG! A bit of a math-fail, I want to try this again using my 5" swap charms. It's now sitting on a shelf in my closet. Someday, somewhere, someone will be needing a king-sized quilt and I will be ready!


Next up - DONE!
North Star by Pat Speth

This was a free pattern on Pat Speth, the Nickel Quilt Lady's Facebook page. It was made from 5" charms (our favorite!). I did change up the sashing a bit and used up a ton of homespun fabric (9 yards). The yellow constant was yardage but the all the rest was cut from scraps - charms and chunks.


Bonus!
Although not a homespun or even a plaid, found floor fabric made for the perfect binding.


Remember this? Sun and Moon was an M&M Challenge from 2020. My fabric choices are little erratic - my job was to test out the pattern instructions and use up ...  CHARMS!. It's quilted, bound and labelled ... and ... surprise - it's the backing for Solstice Star.


Solstice Star is DONE! This one took a bit of time because, well, summer. I really was second guessing my choice of reds/yellows. Once DONE - quilted, bound and labeled - I LOVE IT! It's bright and scrappy happy. The instructions are on our Facebook  group.


Sew - here we are, in the middle of August. My daughter is back teaching 3rd grade, my grandie is back in childcare and I'm back in the sewing room. 

Keep stitching,
Mary


Saturday, July 10, 2021

Aprons

Since becoming friends and then buddies and now M&M, Marjorie and I often crack each other up with our similarities. Often I'm texting her "a great idea!" and my phone starts buzzing with a text from Marjorie with, "I just had a great idea!"  AND ... way too often, it's the same idea!

When I told her I had a couple of yards of some OLD Sunbonnet Sue fabric, she said, "I also have a couple of yards." Now ... I tried to convince her that there's NO way she had this same OLD fabric. She insisted she did. After a little digging - she had several yards, in fact, she had more than I did.


Seriously ... who has 5 yards of this fabric?! We do! I was not quite the fan of Sunbonnet Sue as my buddy, Marjorie. I called this fabric: Mushroom People. I'm becoming a convert.

When we're teaching, lecturing, doing demos, we both love wearing an apron with pockets. What the heck were we going to do with this fabric? Make (and wear) aprons, of course.


Don't you just LOVE our aprons?!! We've had several requests for pattern info. Unfortunately it's an OLD Simplicity pattern that is no longer available. I've found a couple of similar ones if you're interested in making a cross-back/no ties apron with POCKETS.

Here's a free pattern from Purl Soho for a cross-back apron you can make for yourself. And this one is a CrissCross Apron pattern.

Summer is flying, it's already mid-July, we've had our first hurricane event (just some rain and a bit of wind). We're still sewing and plotting ... stay tuned!

Keep Stitching, Mary


Monday, June 14, 2021

The Irony Of It All

                                  NEVER TRY TO IRON A CUPCAKE

My iron is self-cleaning – a lot of newer models are. But what does that actually mean?  Late at night when everyone’s  asleep the iron jumps down off its board pal and hops over to the cabinet, pulls out the sole plate cleaner and a plush rag and wipes  itself  off?  Not hardly, although that would be nice if it did.   And if your iron is  NOT “self-cleaning” perhaps the iron fairies sneak into your home late at night with iron cleaner and take care of it while you’re fast asleep? 

Nope – cleaning an iron takes human interaction – and preferably on a regular basis.  Like many items we may own and use we are supposed to maintain/clean them on a “regular basis”.  In Florida we change our AC filters every 60 days (sure we do).  We change the oil in our cars every 5000 miles (yeah right).  That smoke alarm battery should be swapped out every 6 months (opps, I’m late).

And then there’s doctors.  How often do we see them? Fortunately for regular “maintenance” a doctor or dentist will normally schedule your next appointment before you leave the office.  Most offices will have a system that even reminds us of the appointment a few days in advance.  Easy!

So why does my iron look like I tried to iron a cupcake???  Don’t get me wrong, I didn’t intentionally neglect my iron. In fact, I wipe the sole plate with special iron cleaner every few weeks.   I also use steam, a lot of steam.  I love nothing more than steaming a bias edge into submission.  Steam is also a great way to get those bulky, overlapping seams to lay flat and corners to stay crisp. When working with wool or hand embroidery steam is wonderful for bringing out dimensional features that would be lost if flattened with traditional ironing.  After all, using steam regularly keeps the jets clean and the iron free of gunk, right?  Wrong!

In order to “self-clean” my iron I was supposed to use the button labeled “self-clean”.  But I didn’t – ever – thus the cupcake appearance.  I imagine it was building up for quite some time until finally my iron just gave up and spued forth years of mucky, yucky, nasty goo.  Lucky for me it happened when I was steaming the back side of a wool applique project so none of the nastiness got on my quilt.  Talk about a close call!!  It also caused me to use some very specific adult language - which brought my husband running to see what had occurred.  His first instinct was to say “gross, do we need to go buy you a new iron”?  As tempting as that was, I didn’t think I should have to spend a ton of money replacing an iron that cost a ton of money and is only 3-4 years old. 

Gotta love the internet and those kids who grew up with the world at their fingertips (even if they only type with their thumbs).  My Gen Y child immediately got on her phone and started searching for an explanation.  It took her less than a minute to ask “mom, do you ever push that button that says “self-clean”??   Rowenta self-cleaning function   Smarty pants!

If you “self-clean” your iron regularly I suppose the self-clean function will work just fine.  If you haven’t EVER used that function it may take a little more than just pushing that button to get the iron truly clean.  Because my iron was in such sad shape, we filled the water tank with a solution of 50-50 water to vinegar ratio - not once, not even twice but three times before the iron finally stopped oozing out the nasty stuff.

My iron is good as new!  When was the last time you “self-cleaned” yours?