
As quilters and makers ... we quilt and make. It's almost never about "needing a quilt." Its almost always about "needing to MAKE a quilt." Did you make The Perfect Storm quilt?

The Perfect Storm quilt produced a LOT of cut-offs. They are my very favorite unit to play with in a quilt.
Sew - what can you do with your parts?
Once the Storm is DONE. The sky clears and out come the Stars. Don't let this opportunity get away. In fact, use what you started ... you're already on your way.

Check out the M&M Sew Charming Facebook Group in the file, there is a pattern for both "The Perfect Storm and Second Hand Stars. This post has more pictures, words and helpful hints than is in the written instructions ... think of it as a companion piece to the companion piece.
Remember ... it says in the instructions ... the MATH for this quilt isn't hard but it is NOT typical. Make sure you read it carefully.
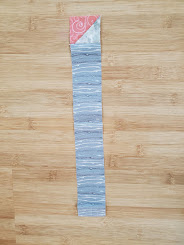
Gather up all those cut-offs. Hopefully, they are already stitched together in pairs into half-square triangles (hst's). If not ... start stitching them! Then square them up. I was able to square all of mine to 1.75" x 1.75". If you can do that ... do that. If not, you should be able to square up to 1.5" x 1.5". The pattern has instructions for the MATH, either way.

The orange/neutral HST's were all squared-up and then set aside ... their job comes later. The yellow/neutral ... also square-up and set aside - they aren't used in the quilt but I'm quite sure they will find their place in the quilt world someday. You will need the other HST's.

The seam will snuggle so nicely if they are going in opposite directions. The points will match sew much easier this way.

After you build your star blocks (read the pattern - it's pretty simple), you will be using them as the center for a light/dark log cabin. I choose to use neutrals for the top/left and blues/greens for the right/bottom. This was in keeping with my Perfect Storm ... hello, floor fabric! I used 1.5" strips - stitching a light /dark (left/right) then a light/dark (top/bottom). I did these assembly-line and did not square up ... just kept on sewing. Do this for 2 full rounds on each block.

THEN switch to 2.5" strips. This is a game changer for getting the blocks all to the same size.After stitching the 3rd round (2.5" strips this time), square-up the blocks to measure 12.5". Now they are nice and uniform ... SEW much easier to work with then trying to precision sew from scraps, strips and leftovers.

SASHING TIME!!
When I first started my Second Hand Stars, I pulled all the orange/neutral HST's. These I saved for the sashing. I laid this whole quilt out, adjusting the log cabins in a pleasing pattern, making sure the color was evenly distributed ... you know ... move the blocks and move the blocks and move the blocks again, then put the blocks back and take a picture and walk away. Come back and move the blocks around a little more and sigh. FINALLY - be happy with the layout.
Remember ... check the pattern for weird MATH when cutting and sewing your strips. The MATH is correct (I think) it's just not typical quilter MATH.
Then, layout the sashing strips and the HST's. You will be making Second Hand Friendship Stars in the middle of the quilt but not at the edges. It really is easier if you lay it out then stitch it together. I only had to rip out 1 seam and resew it correctly. THAT is a great feeling.!!
Borders? Yes, please!
The decision about the borders took forever. I thought about doing a pieced border - flying geese? More HST's? Then I thought - just use a big chunk of fabric and GET-IT-DONE.
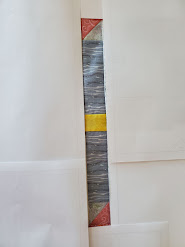
But ... in keeping with the Second Hand Stars theme - I decided to do an easy pieced border from my 2 1/2" scrap bin. I pulled lots of strips (blues/greens) and stitched them together. I measured, cut and sewed them on, building the strip snake as needed. 2 rounds gave me a 4 1/2" border that seemed just right.
Go the the M&M Sew Charming Facebook group for the complete pattern.


